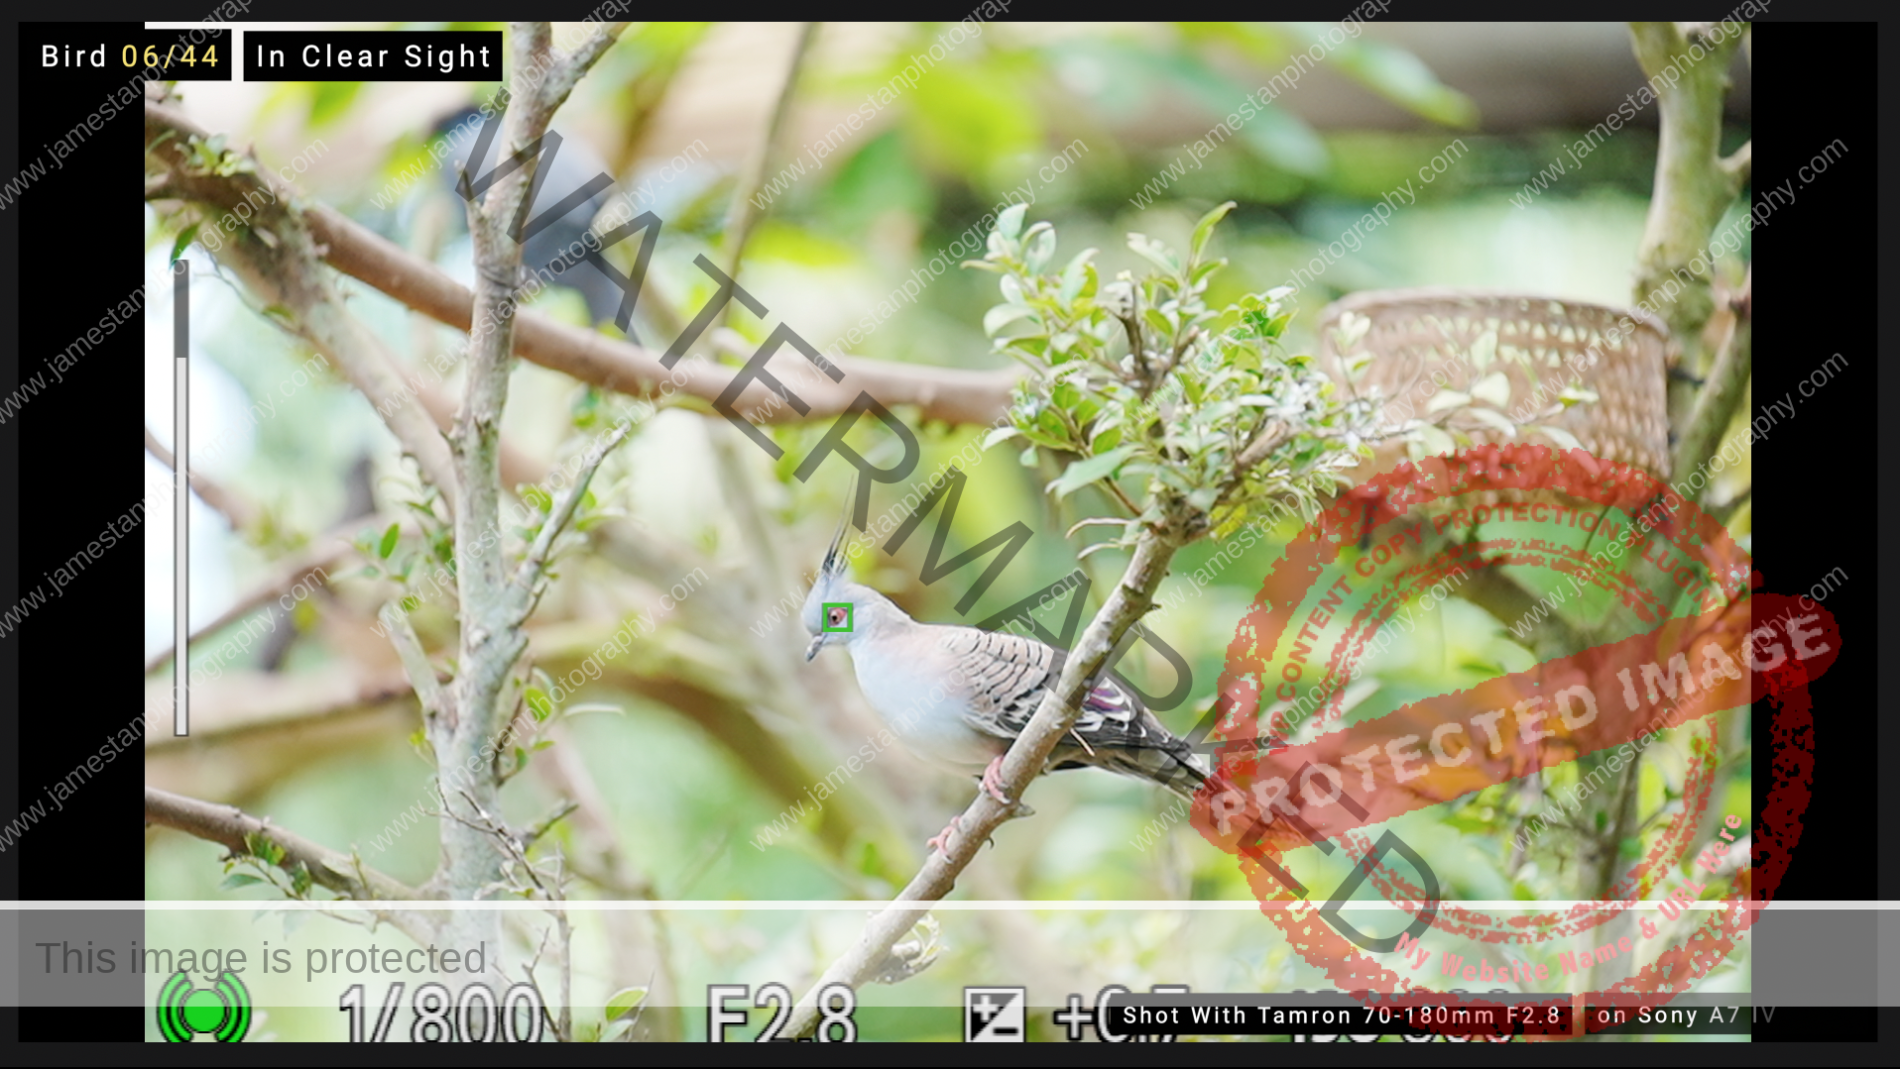
Could you rely on Sony A7 IV Bird Eye AF? What could you expect from it? I tested the Sony A7 IV (with firmware v1.10) Bird Eye AF with Tamron 70-180mm F2.8 over 70 birds and more than 200 test shots. Check out the testing on my YouTube channel here (or you can watch directly below after accepting the Cookies)!
So, the test video clips should show you what you could expect from Sony A7 IV’s Bird Eye AF. In short, the Bird Eye AF works brilliantly on the birds with minimal movement. As long you see the Eye AF overlays on the bird’s eye, you should be confident that the camera is accurately focusing on the eye. However, fast-moving and flying birds could be a challenge to the Bird Eye AF system. Sony A7 IV swiftly identifies and tracks the flying birds, but I didn’t see any Bird Eye AF overlays in the replays.
And yes! The Bird Eye AF works similarly in video shooting as well.
Bird Eye AF Test Summary
Let’s have a glance at the AF test summary for each test scenario.

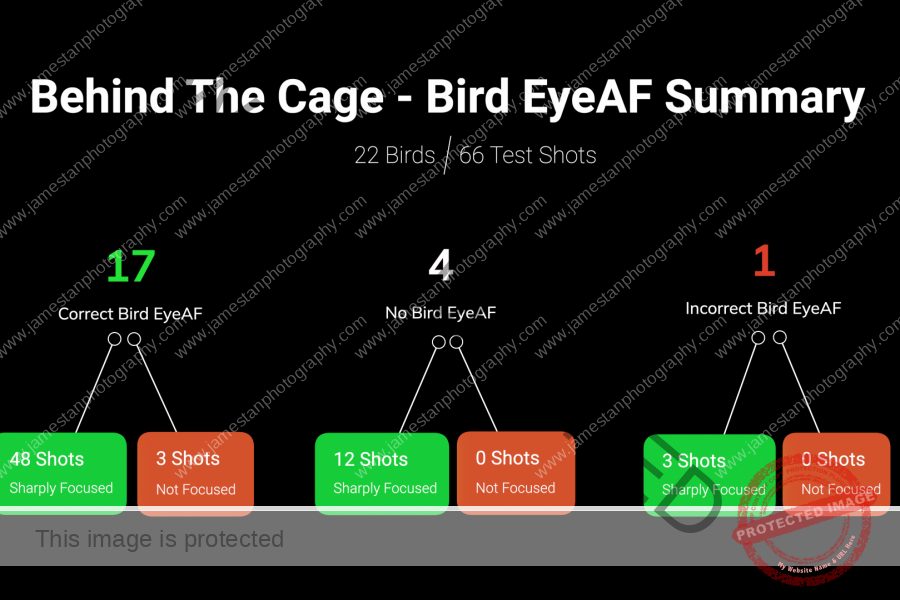
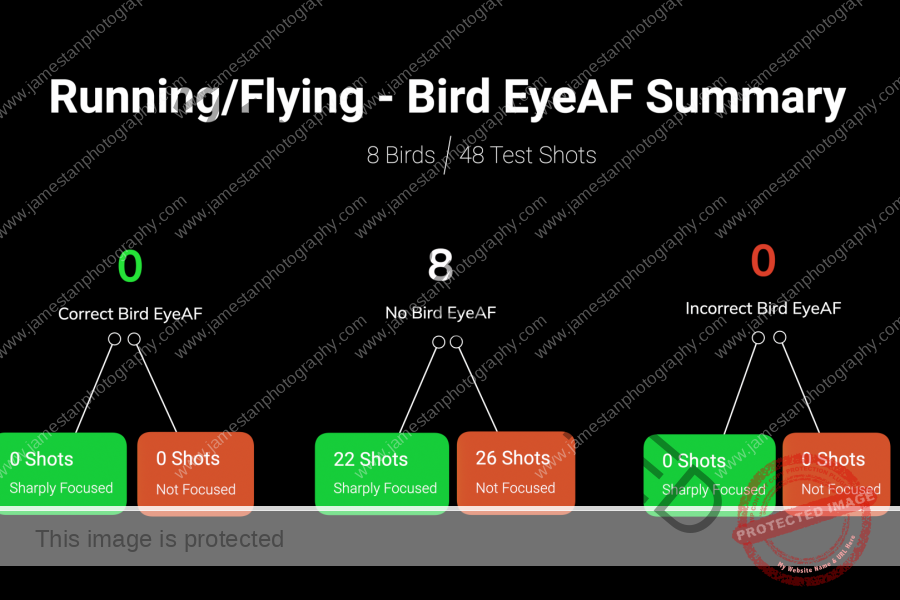
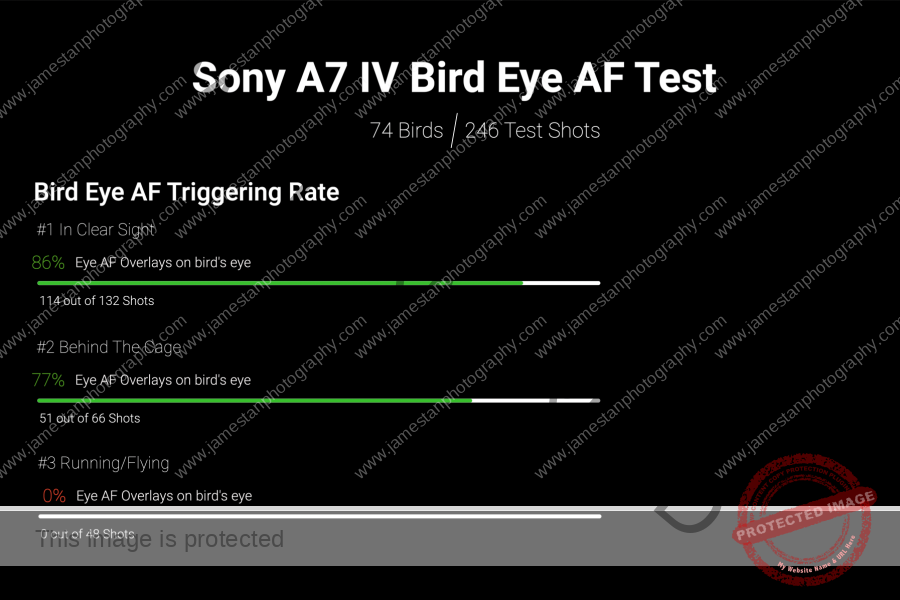
During the shooting, Sony A7 IV triggers the Bird Eye AF around 80% of the time when shooting the resting birds. The tallied results are close to my shooting experience.
I know I will get a sharply focused shot when I see the Bird Eye AF overlays properly on the bird’s eye. The summary below shows the focus rate with Bird Eye AF triggered (I exclude all the shots without the Bird Eye AF from the summary below).
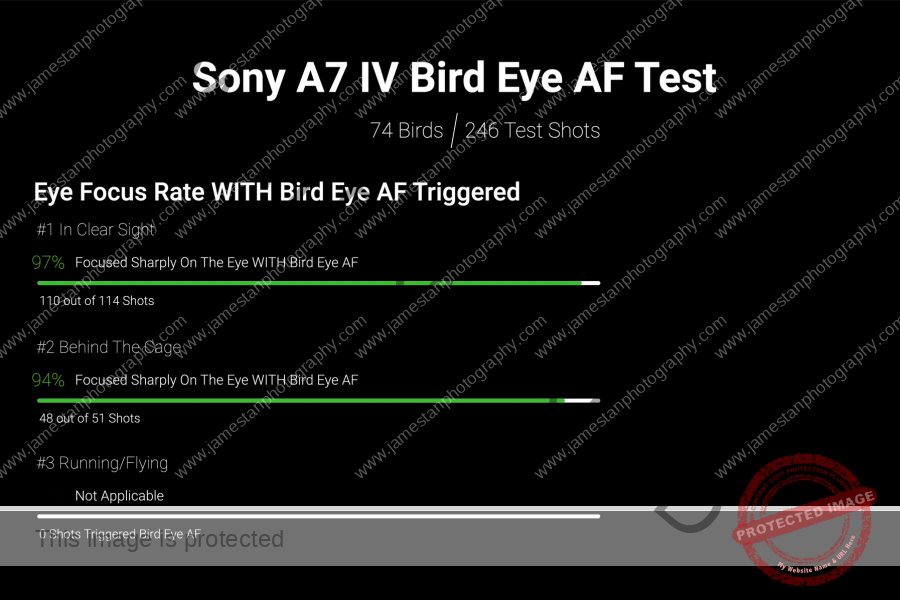
Sony A7 IV does not always trigger the Bird Eye AF, but its AF system is reliable to cover the focusing job. However, I feel more frustrated when the Eye AF overlays in the wrong place. Luckily it only happened occasionally.
Exclusive Tips!
I have some tips that could help you to get more keeper shots with Sony A7 IV.
First, aim the side view of the birds!
Shoot the side view
The camera does a better job of identifying the bird’s eye when shooting the bird from the side view.

Next, get closer to the birds! No, not closer physically, but optically! A typical 70-200mm zoom lens (I was using the Tamron 70-180mm in the bird park) is barely enough for bird photography. Try the 100-400mm or longer lens if possible!
Zoom Tightly Onto The Birds
Sony A7 IV focuses faster and more accurately on the bird’s eye when it takes a significant portion of the frame!

Last but not least, use different AF focus area settings for resting and fast-moving birds.
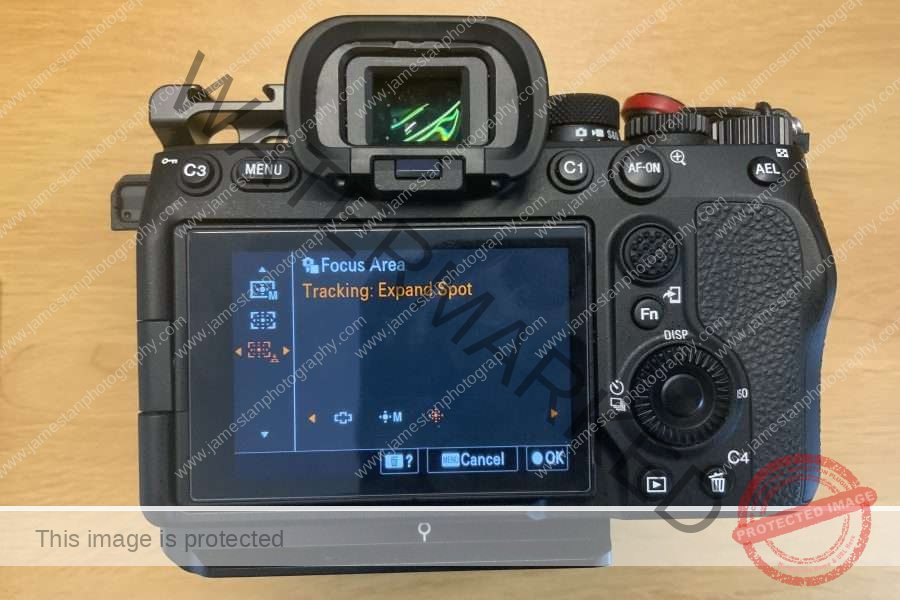
Use “Tracking: Expand Spot” Focus Area For Resting Birds
It gives a faster and more accurate result when shooting those resting birds.
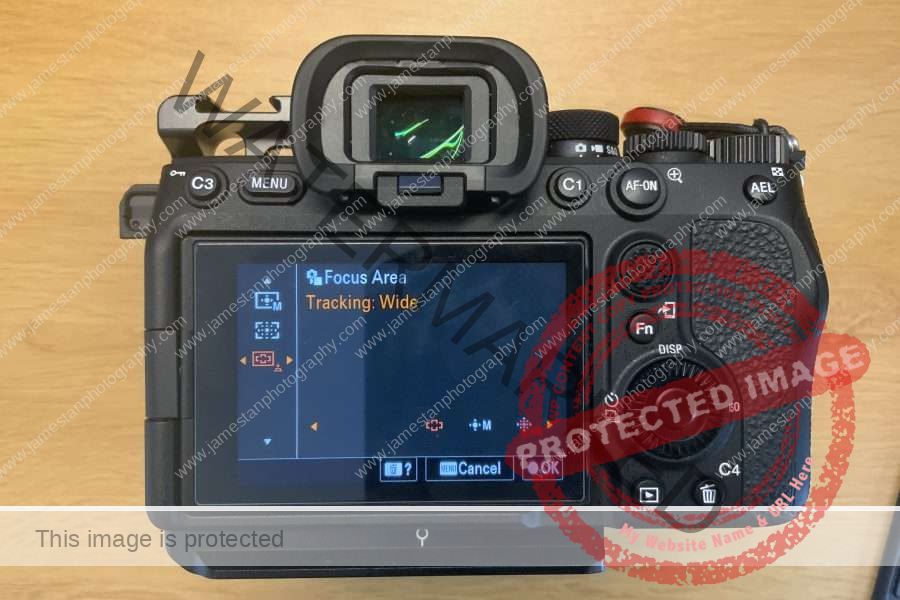
Use “Tracking: Wide” Focus Area For Fast-Moving Birds
Sony A7 IV could detect and track the bird faster than us
Conclusion
The Sony A7 IV Bird Eye AF performance exceeds my expectation.
It is is basic but functional. It won’t turn a beginner into a professional, but it gives a certain level of assurance and confidence during the shoot. I will be showing you the animal Eye AF test in the coming video.
So, click the button below to subscribe to my YouTube channel for the upcoming video.
Peace!
Is This Post Helpful To You?
I started this site with the intention of sharing my learning and working experience in photography. It takes significant time and cost to pick up and learn a new gear/technique, and then draft a post to share with everyone. The effort is worthwhile if it helps you and others save unnecessary time and money. I would be glad if you benefit from my content, and you may leave a one-off tip to keep this site running.
Besides, you may support this site by making your purchase through the affiliated links below. The product price is the same when you use the affiliate link, but a qualified purchase earns me a small commission. As an Amazon Associate I earn from qualifying purchases.

